
Welcome back to the crafter's bucket list. In part 2 we'll start on some actual projects you can get stuck into.
#11 Crochet Flowers
.JPG)
So #2 on our bucket list was crochet basics, and now you can put that knowledge into action and make these cute crochet flowers. Scroll down the page for the instructions in English.
Or you could try these triple layer flowers if you're feeling confident! Click here for the instructions.

#12 Mod Podge Decoupage

You can decorate almost anything with mod podge and pretty papers. Firstly, check out this guide to mod podge. And then, why not have a go at this simple coaster project to get you started and trying out the techniques.


#13 Bracelet Weaving
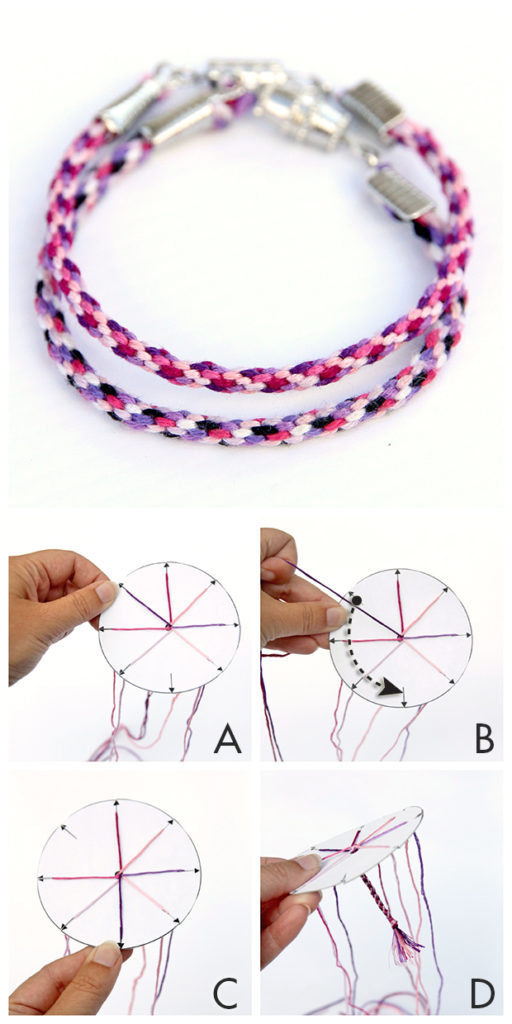
Click here for a step by step tutorial on weaving a bracelet. The process made me think of french knitting. Make sure to read the instructions which are further down the page as the photos are a bit confusing on their own.
#14 Recycled Cereal Box Magazine Holder

Here's a simple upcycling project you could probably do right now! All you need is a cereal box (a nice large one is best - the one I used is a bit too small to hold A4 sheets), some patterned paper - you can use scrapbooking paper if you have some or wrapping paper (brown parcel paper would be great for the kraft look), scissors, glue (a glue stick is probably best), double sided tape is helpful but not necessary a pen and a ruler.
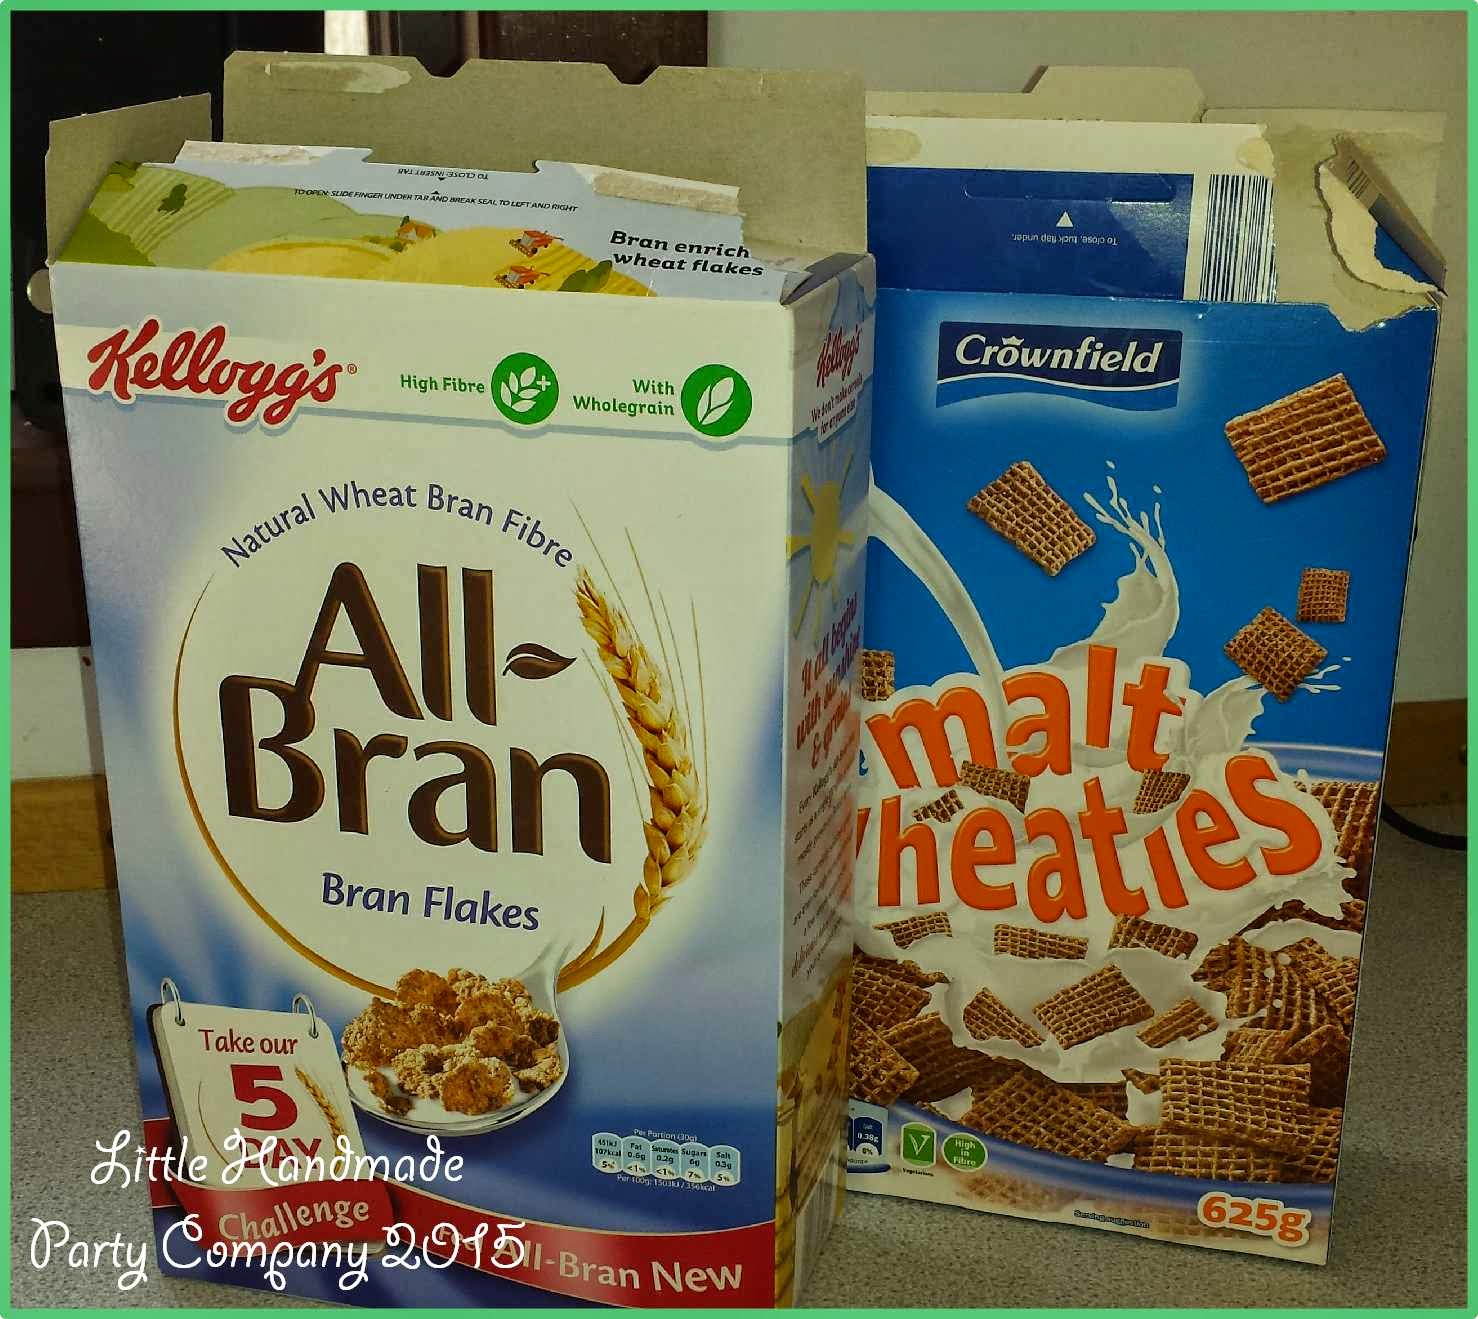
1. First, select a suitable cereal box. If you want to store paper or magazines then choose a large box.

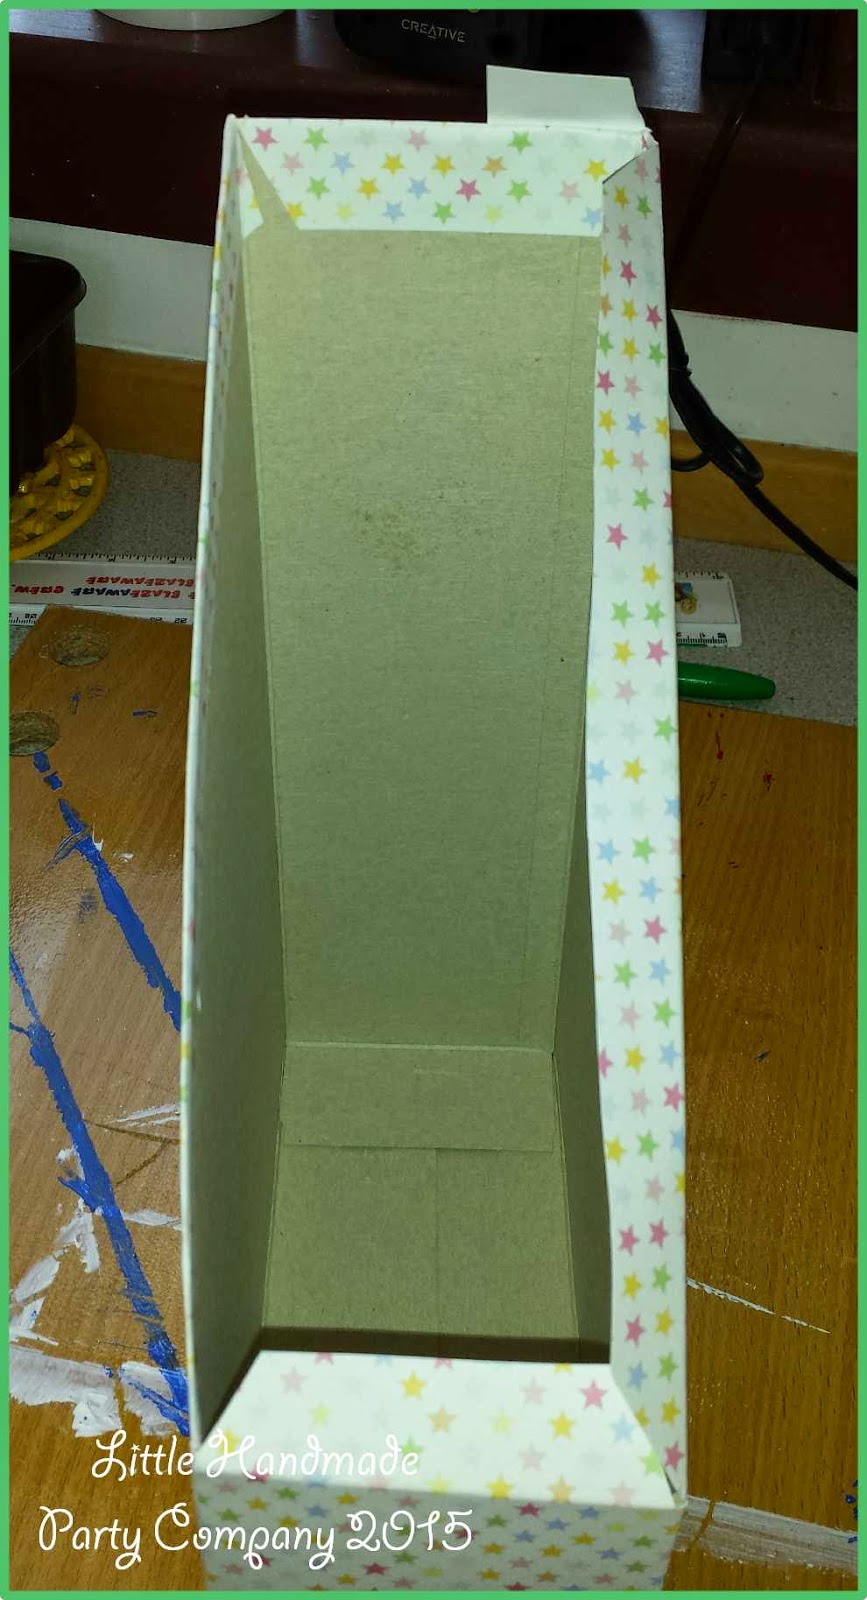
2. Use a ruler and pen to mark out a wedge shape to cut away. Make a mark about 1cm from the top of the box, then another at the other side between 15 and 20cm from the top (it's up to you what measurements you use). Turn the box and mark the front part 15-20cm down and then repeat the first part on the back of the box.

3. Cut away the wedge at the top of the box. Your box should now look like this.

4. If you are using a thick paper like a scrapbooking paper, then it's a good idea to crease the paper before glueing down. Carefully lay the paper on the box nice and straight and gently crease the paper along the edges of the box. Take the paper off and fold again.

5. Now you can apply glue to the box, making sure you cover all the edges. Only cover 2 sides at a time to keep it neat. Apply one piece of scrapbooking paper at a time.

6. Trim the excess paper off, leaving about 1 inch overhang. Fold the overhanging pieces over and glue down inside the box. If you ever covered your school books with paper when you were young you'll remember having to cut away triangles to make the corners neat. Use the same principle on your box.
7. Repeat steps 4-6 for the second piece of paper if using.

8. Line the inside of your box. I never got round to this on mine but I'll get it done soon! Lay the box onto some paper and trace around it. Do this for all 4 sides and the bottom so you should have 2 wedge shapes and 3 rectangles. Cut these shapes out just inside the line you have drawn. Check that the pieces fit before glueing in place. You can also add decorations to the holder.

#15 Origami Butterflies

These beautiful butterflies would be perfect for decorating your magazine holders or other projects. You could use any kind of paper, including newspaper or old book pages so they are pretty cheap and easy to make. Find the tutorial here.
#16 Quick Fabric Bookmark

This tutorial for a bookmark looks pretty simple and you could easily sew it by hand if you don't have a machine. I love that it should stay in place well (not counting my kids getting hold of it and just pulling it out to have a look!!). I think this one is going on my list of things to do very soon and I think the padawans could give it a try too, so watch out for a post on our attempts!
#17 Cross Stitch Picture

The Crafty Guild has some lovely free cross stitch patterns so if Olaf isn't your thing, there might be something else here you'd like. They also have crochet patterns. You will need to register with them to download the patterns but it's simply a username and an email address.
Here are other sites where you can get hold of free charts - some require registration.
There are loads out there but these should keep you busy for quite some time!


#18 Paper Cutting

Paper cuts look fabulous when they are done and with some simple tools, a steady hand and a whole lot of patience you can have a go too! This site has a good guide to the history of paper cutting, some tutorials and some ideas of where you can go with this amazing craft.


#19 Frosting Cupcakes
I love cupcakes and they are so popular just now for all kinds of occasions from birthdays to weddings and just as a nice treat with your afternoon cup of tea! This link has some tips for getting beautifully decorated cupcakes and some links to cake recipes so you can craft your own scrummy cupcakes and treat yourself, your family and friends! Enjoy, and let me know when you're making these so I can pop round and have a taste!
#20 Altered & Mixed Media Art
Whilst researching ideas for this blog series I have fallen a little bit in love with altered art and mixed media art. I'm not a skilled artist by any stretch of the imagination but with this kind of art it really doesn't matter! There doesn't seem to be any rules to what you can use or the techniques you can employ for this art genre - just let your imagination run wild. Use Pinterest to find inspiration if you need it and then hunt around the house and the craft cupboard for things you can utilise.
Click here to see the post on how to create something similar to the picture above. And I also found this page with some history on altered art and an attempt at a definition.
Below are some photos of mine and my 12 year old daughter's altered mixed media art. We used old coasters as our base and raided my supply of buttons, ribbon, peel off stickers, papers and gems and combined them tin foil, kitchen paper, sizzix cut letters and paints.
I hope you have fun trying out some of these ideas. If you share any photos of your creations on Instagram, Twitter or Facebook use the hashtag #craftersbucketlist so we can check them out!
Take care and happy crafting
Hugs Suz x
No comments:
Post a Comment